Ribbon and Washi Tape Dispenser
- DIY Dad

- Feb 3, 2019
- 4 min read

How did I get here? What am I doing? How did I get roped into doing this?
All good questions...I really don't have an answer. As you can probably tell, this one's a little out of my norm...
The best thing I can come up with is that my mother-in-law loves Pinterest, and she sends me a lot of pins. Most of the time, I look at her pins and send her a thumbs up. Maybe I'll save one on occasion. And then, there are rare moments like this, where she sent me something that was being sold online for a little too much money from parts that I have laying around my workshop!
I couldn't help myself. I HAD to take it on!
Let's get into it! I started off with the base...

The Etsy site that the pin linked to was nice enough to tell me the general dimensions of the whole piece. Obviously, not the detailed dimensions of each piece, but enough for me to get started!
The site said the whole piece measures 6 1/4" wide x 9 1/2" long x 8" tall. So, the base needs to be 6 1/4" wide x 9 1/2" long.
I used some 1/2" pressed plywood I had laying around and cut it to size. I sanded it down and rounded the edges with my belt sander/palm sander combo. On to the next piece!

I figured that the wheels were about 6 inches in diameter from the picture reference. I used the same wood as the base and traced (2) 6.5" circles. I actually used the bottom of a gallon paint can! I cut them out using my scroll saw.

Obviously, the scroll saw isn't great at cutting out a perfect circle, much less two. If anyone knows a better way to do so, hit me up!
So, I clamped both circles together and sanded them down at the same time using the belt sander. I also rounded the edges to prevent splinters or cuts.

I also cut 2 pieces of scrap 3/4" whiteboard to 5X2 inches each to serve as the axle holder. I also rounded out the edges and sanded them down. These are going to become the pieces on either side of the base that holds the spinning axle.

I decided on using a 7/8" dowel rod as the spinning axle for this project. I used my scroll saw and cut an indent on each support beam for the axle to rest in. They had to be rounded indents for the axle to spin, so I matched them up as best as I could and sanded them down smooth.
To the axle!

I cut the axle at 9.5" long so it will stretch along the length of the base. After a little sanding on the cut section, I tested the support indents, and the axle sits nicely inside. Time to attach the support beams to the base!

I marked the base at the midway point and matched it up with the midway point of the support beam (which I also marked). I screwed both beams in using (2) screws each from the underside of the base. I added wood glue on the joint for some extra security.
Next, I drilled out a 1" hole in the exact center of each circular "gear" using a 1" spade bit. I sanded and rounded out the holes before mocking up the axle with the support beams.

Wow, it's starting to look like something! Plus, it spins!
No glue or anything is required at this point. After all, how would you get the ribbon spools on and off?
Next up is drilling the holes for the dowel rods that will hold the ribbon/washi tape.
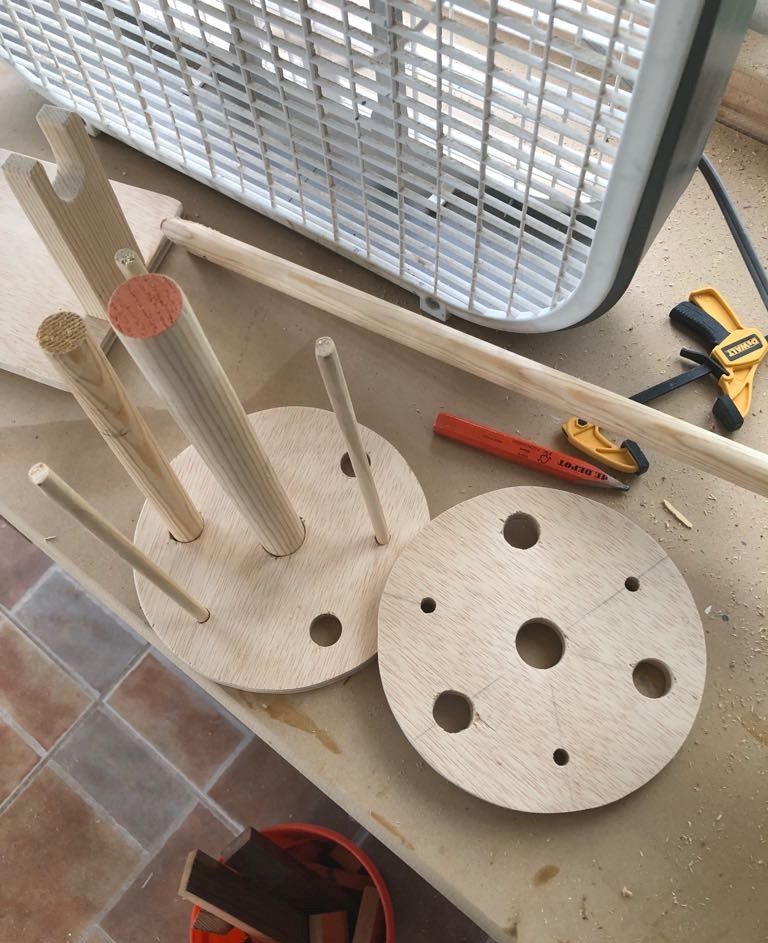
I divided the circular "gears" into six sections and drilled alternating width holes for the dowel rods equal distance apart. The dowel rods will be 1/4" and 3/4" diameter and will alternate. I used a 1/4" drill bit for the 1/4" holes, and a 3/4" spade bit for the 3/4" holes.
The easiest way to make sure the holes matched up on each gear was to clamp them together and drill out the holes for both at the same time. Once the holes were rounded out, the dowel rods were cut and test-fitted.
I cut my dowel rods to about 7.5". It's important to cut them precisely so that they rest inside the "gear holes," but won't stick out of the ends. If the rods stick out the ends of the "gears," the spindle won't spin; it'll just get stuck every time.

I used some liquid nails on only one side of the spindle to secure the dowel rods to the circular "gear." That way, the other "gear" can be removed to change out ribbon or tape as needed. After letting it dry thoroughly, it's all done!
I considered painting it, but the pin I was sent was natural wood. Plus, it's going to be adorned with all different colors and types of ribbons, so a more subtle base will probably work better anyway.
This project really didn't take too long, surprisingly. About 3 hours total. There was no waiting really, just pounding away at it, slowly but surely. Plus, I was able to use only scrap wood that I had in my stash to complete the whole project! Not a single cent was spent, and those are my favorite kinds of projects!
This goes to show me that doing something that isn't necessarily in my "comfort zone" and may seem very "obscure" can actually be fun to make! I had a blast! Very rewarding and surprisingly challenging, I'm super proud of this piece! I will definitely be looking for more things like this to make in the future!
-Kevin


Comments