Recycled Shamrock
- DIY Dad

- Feb 3, 2019
- 4 min read

My mother-in-law is already thinking ahead to St. Patrick's Day! I feel like I just finished the Reclaimed Wood Heart (check out the blog post!) not too long ago for Valentine's Day! What's next, Easter?
.............................
Well, yes actually. So that will almost definitely be on the docket in a month or so. But let's stay focused here!
My mother-in-law sent me a pin of some pallet shamrocks for St. Patrick's Day on Pinterest. They were really nice, but kind of pricey. I also noticed that they weren't really "rustic" enough for her taste, so I offered to do something myself.
I told myself beforehand that I was only using recycled wood on this project. But not only recycled wood; only the wood from inside my scrap bucket.
To make it into my scrap bucket, the pieces of wood have to be less than a foot long. Before this project, my bucket was overflowing with scraps of 3/4" whiteboard of all different sizes and shapes. Now, not so much...
Let's see how it came to be!

I started off with thin backer-board; the same that I used on the back of the "Phoenix Sign" and the "Reclaimed Wood Quilt Square" (check out the blog posts!).
I sketched out a rough outline of a shamrock until I got the shape that I wanted. Now, to the scroll saw to cut it out.

On this thickness of wood, the scroll saw was a breeze! It won't be so easy when I have to revisit it later...
I went ahead and lightly sanded the edges of the shamrock to remove any flaws in the overall shape.
I went ahead and arranged the pieces of scrap wood that were in my bucket to completely cover the shamrock outline...

There was no real pattern or method to the madness; just as long as the shamrock outlines was completely covered. You can even see some pieces I was going to use for the "New Addition" sign (check the...you know...).
After the pieces were fit together, I clamped them into place and flipped the whole piece over. I promise, the outline is under there!
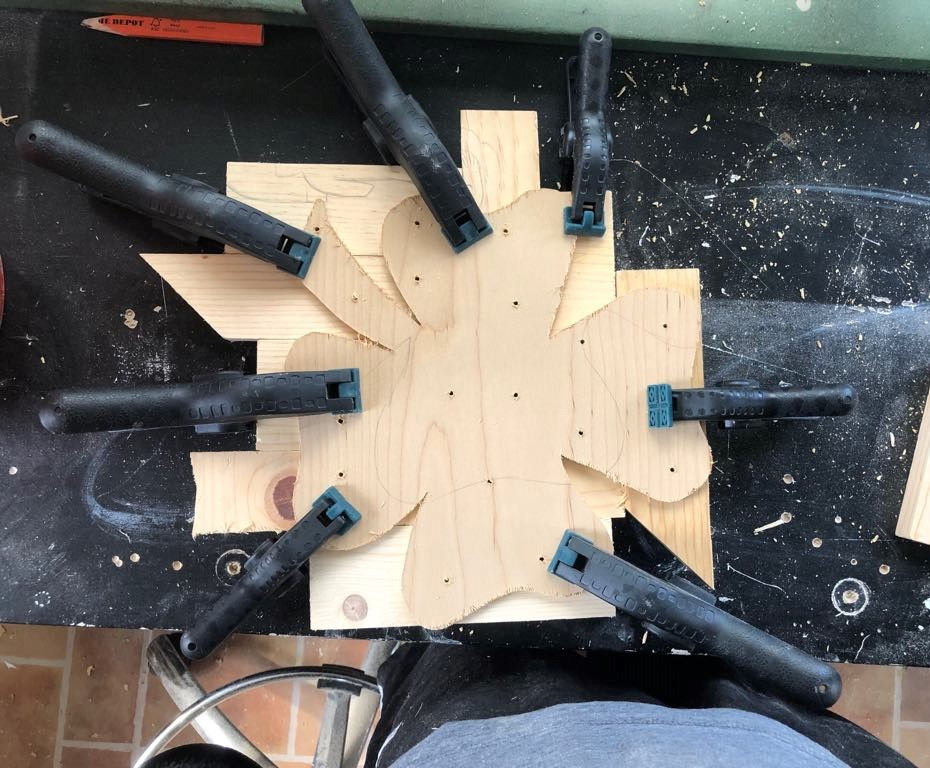
See! I told you!
I decided on using screws to secure each plank to the outline. Because I'll be getting a little "rough" on this piece, I thought this would be the best way to make sure it stays together. And I happen to know that my mother-in-law won't care about how the back looks.
I drilled small holes for each screw to prevent cracking and screwed each piece to the shamrock outline.

After making sure every piece was screwed on, it's time to revisit the scroll saw! This time, I just fed it through upside down while following the outline backer-board.

It definitely came out unique! I sanded down the edges to remove the splinters as well.
But, it's not "rustic" enough for her yet!
So, I get to do one of my favorite things! I get to SMASH!

I've done this technique many times before, most recently on the "Little Picasso Artwork Display" (you know what to do!). I use everything from nails to hammers to screws, etc. Anything that I can use to rough it up! My new favorite tool to use is a chisel; it really tears up the wood nicely and gives it depth and dimension.
After the beating, I sanded it down with some 120-grit sandpaper using my palm sander. Just enough to remove the really gnarly splinters and such. I used a small flathead screwdriver to dig out the holes I drilled that got filled with sawdust during the sanding. I think the beauty of this piece is going to be the chaos of the different wood directions and lengths.
After a nice wipe-down with a wet towel, it's time for some paint!

I tried a new technique this time that I found on Pinterest. Usually, I would have stained first and then painted. This time, paint comes first. I used the three different colors that were on the pin my mother-in-law sent me. I applied them haphazardly, overlapping each other and moving in all different directions. I let it dry for about an hour in front of a fan to expedite the process.
Sanding comes next! To achieve the "rustic" look I'm going for, I need to add in some stain. So, some of the bare wood needs to get exposed again!

I could have gone a little easier on the sanding, but I really want the stain to show up! A light wiping, and it was time to apply stain!
I applied some Minwax Dark Walnut stain using a stain rag. I made sure to apply carefully and lightly, just to make sure it didn't overpower the green too much! I made sure to get the stain deep in the cracks and crevices and covered all bare areas.

Game changer!
This paint/stain approach is AMAZING! You all wouldn't believe me if I hadn't shown you beforehand that this came from standard whiteboard scraps! It really looks like weathered wood that's seen better days...
Normally, this wouldn't necessarily be a good thing. But in this case, for my mother-in-law, it's perfect.
The last step is some poly!

I decided on water-based gloss polyurethane finish on this piece. It's not super shiny, but very durable and protective. After attaching a couple D-ring hangers on the back, this bad boy is done!
This project only took about 2 hours to complete (not including the poly, because the stain took a few hours to dry). With this project, I had to make quick decisions and I had a plan A and plan B for every scenario! I was able to keep my promise of only using wood from the scrap bucket, and now I have room for more scraps!
I can't wait to see what my mother-in-law does with it at her house decoratively, but I'm glad to know that it'll be appreciated and put to good use! That's what it's all about, after all!
Happy St. Patrick's Day!
-Kevin


Comments